Building a productive garden on rocky, lava-filled land might seem like a big challenge, but with a bit of creativity, determination, and some unconventional materials, it’s absolutely possible. Today, I want to share how I constructed my garden trellises from fencing and why I’ve embraced container gardening as the solution to the unique challenges of my land.
The Challenge: Gardening on Lava Rock
When I first set out to create my garden, I was immediately met with one major obstacle: the “soil.” Beneath the surface was a mix of rocky debris that quickly turned into solid lava rock, making traditional in-ground gardening essentially impossible. Digging even a few inches was like trying to carve into concrete.
I knew I needed an alternative solution. That’s when I turned to container gardening—a versatile and adaptable way to grow plants without fighting the soil.
Why I Choose Container Gardening
Freedom to Grow Anywhere: With containers, I’m not limited by what’s under my feet. I can place them wherever there’s sun, and if conditions change, I can move them.
Better Soil Control: Containers allow me to choose the best soil mix for each plant. Instead of battling poor soil, I can create the ideal growing environment, ensuring healthier plants and better harvests.
Drainage and Pests: The rocky ground here tends to let water flow through freely, great for drainage, but not so great for getting water to plants. Containers solve that problem, and as a bonus, they help keep some pests at bay.
Space Efficiency: By using vertical supports like trellises (more on that below!), I maximize space, making my small garden much more productive.
Building My Garden Trellises From Fencing
Once I decided on container gardening, the next step was figuring out how to grow vertically. Many of the plants I wanted to grow—like tomatoes, beans, and cucumbers—needed support. Instead of buying expensive ready-made trellises, or tomato cages that are always too small, I decided to make my own using simple fencing material.
Materials I Used:
- Large containers
- 8 pieces of metal fencing (welded wire with 2″x4″ openings)
- Heavy-duty wire cutters
- Zip ties
- Metal posts for durability
- Cinder blocks to hold metal posts in place
- Weed cloth to suppress unwanted growth
- Bark mulch to cover the ground after setup
Step-by-Step Process:
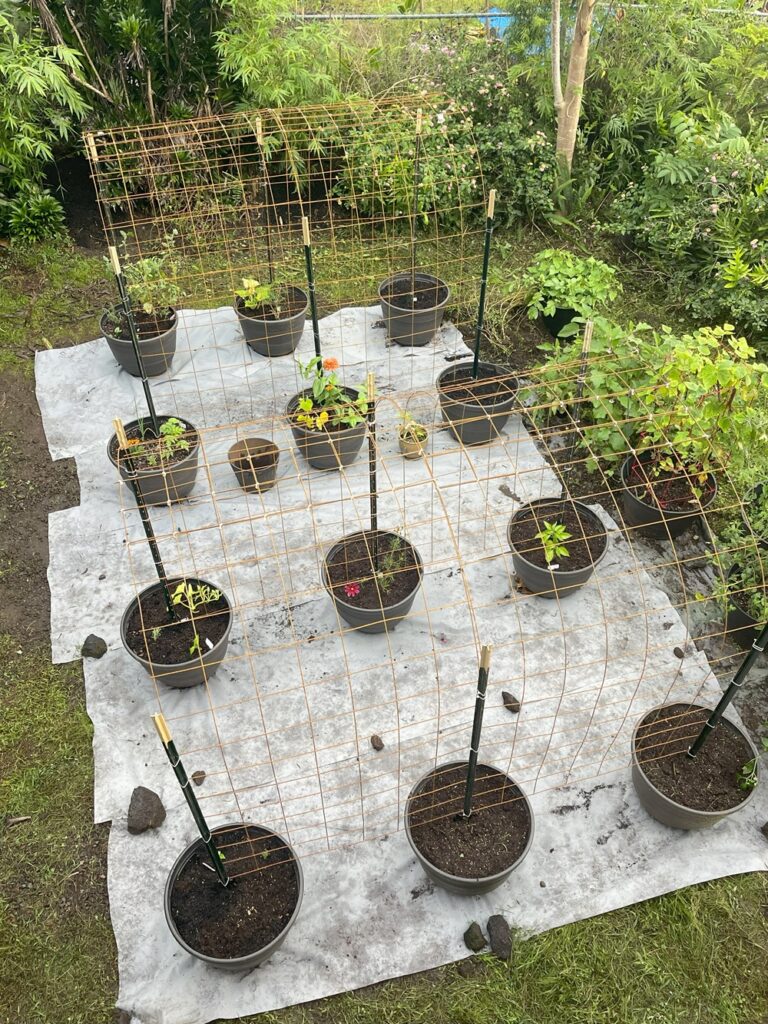
- Plan and Measure the Layout: Before setting up the containers, I carefully measured the spacing to ensure an even, well-organized layout. This not only makes the garden more efficient but also helps with accessibility. I wanted to make sure I’d have enough space to walk between rows and get to all the plants.
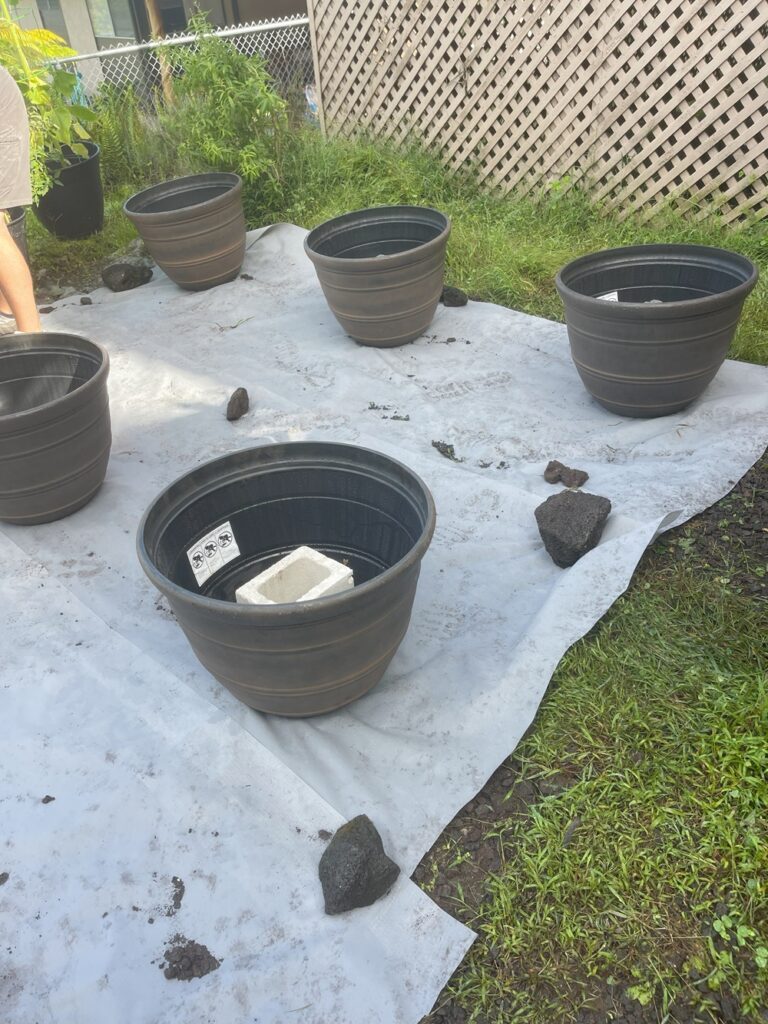
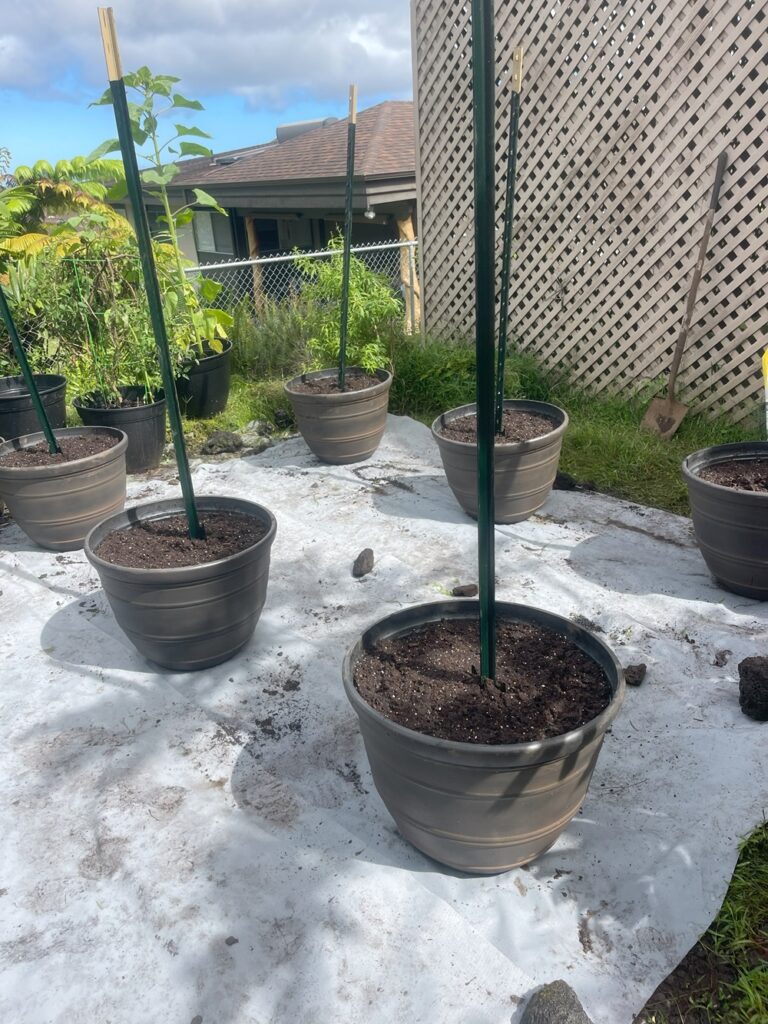
- Add Concrete Blocks to Each Container: I used plastic containers, so they needed extra weight to stay in place with the fencing pulling at them. I didn’t think the soil would be enough weight, so we added a concrete block to each container, these also helped keep the metal posts in place.
- Secure Metal Posts: Instead of using wooden stakes, which can degrade over time, I chose metal posts for their durability. I put one post in each container and secured them in place using the cinder blocks.
- Fill Containers with Soil: We filled the containers with my custom soil mix to create the perfect growing environment for my plants. Filling them early in the process made the metal posts more stable, which made attaching the fencing easier.
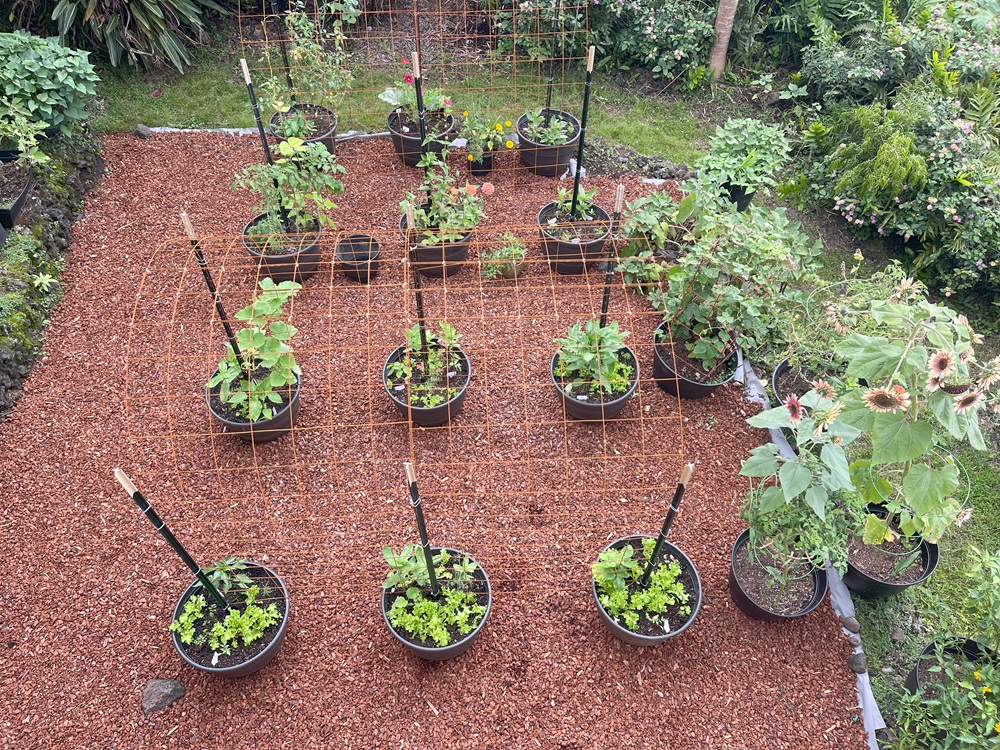
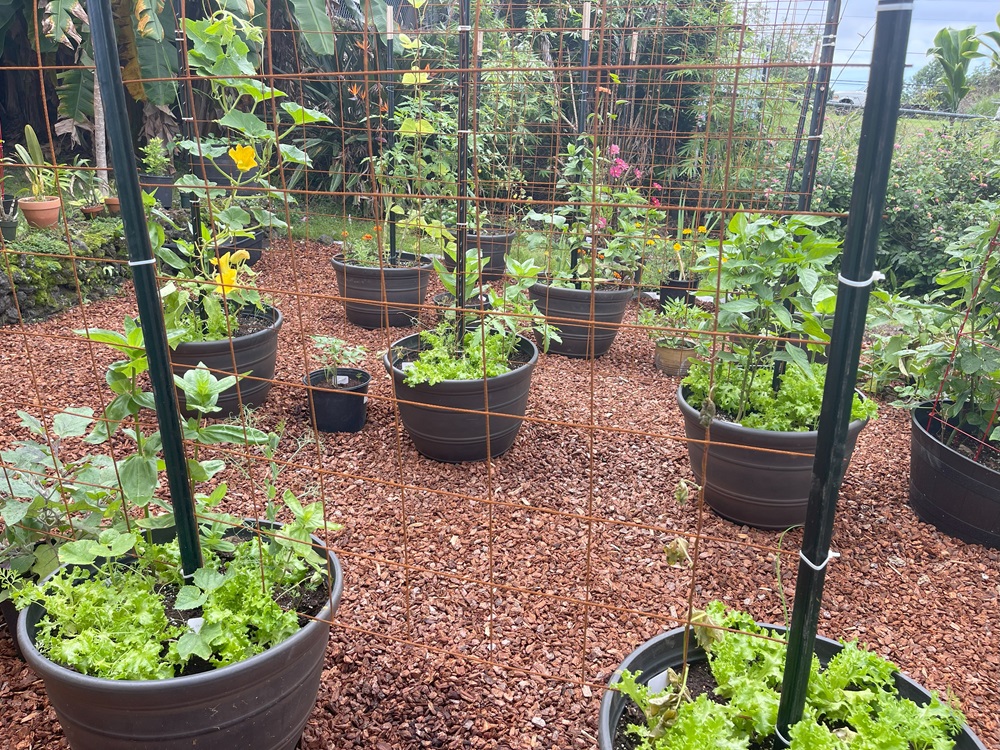
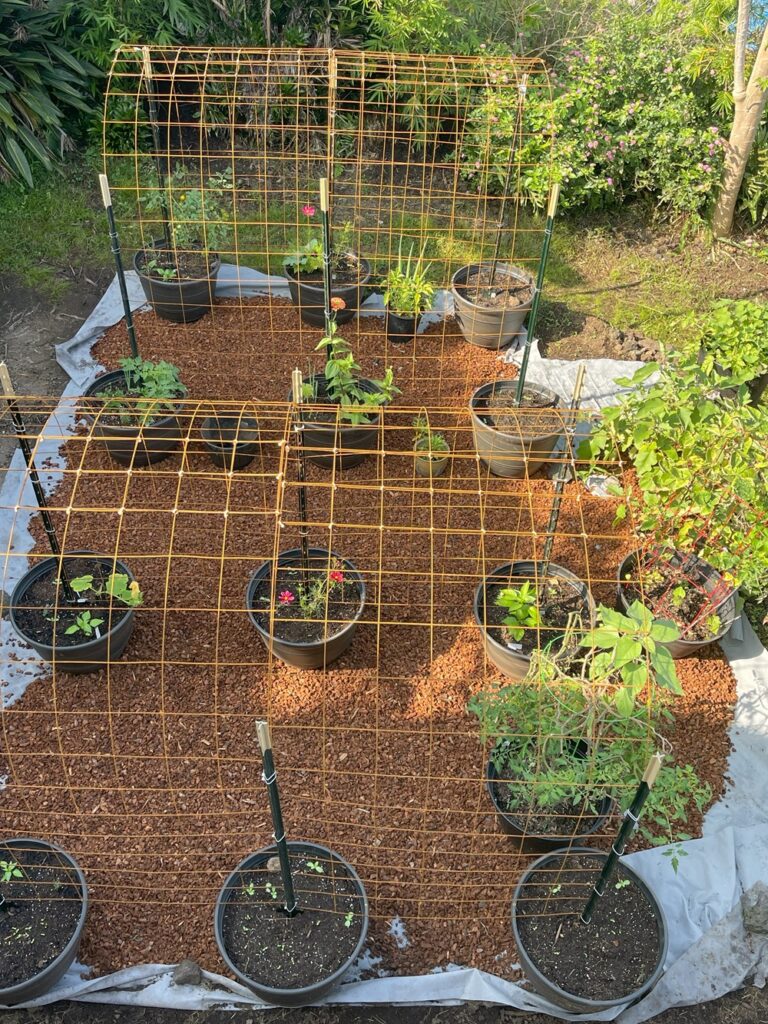
- Zip-Tied Fencing to Size: I could only find fence panels half of the length I wanted, so we zip-tied 2 pieces together for each set of 4 containers. We bent the fence pieces into arches to create tunnel trellises.
- Attach to Fencing to Posts: Using zip ties, we fastened the fencing to the metal posts . This allowed for easy adjustments and ensured a sturdy structure.
- Lay Down Weed Cloth: I placed weed cloth under the entire garden area to prevent weeds from taking over and to create a clean, low-maintenance space.
- Cover the Area with Bark: After setting everything up, I spread bark mulch around the containers to suppress weeds, retain moisture, and give the garden a finished look.
My Custom Soil Mix
To ensure my plants get the nutrients they need and the proper balance of moisture and drainage (especially here where rain ranges from crazy heavy to none at all), I created my own soil blend. Instead of relying on bagged soil alone, I mixed together:
Homemade compost: Rich in organic matter and nutrients.
High-quality potting soil: Providing structure and aeration.
Coconut coir: A sustainable alternative to peat moss that helps retain moisture.
Pelletized chicken manure: Adding essential nutrients to support plant growth.
This combination ensures my plants are growing in rich, well-draining, and nutrient-packed soil, despite the harsh natural conditions of my land.
What I’m Growing in My Containers
Now that my garden is fully established, I’ve been able to cultivate an incredible variety of plants, all thriving and producing now. Currently, I’m growing:
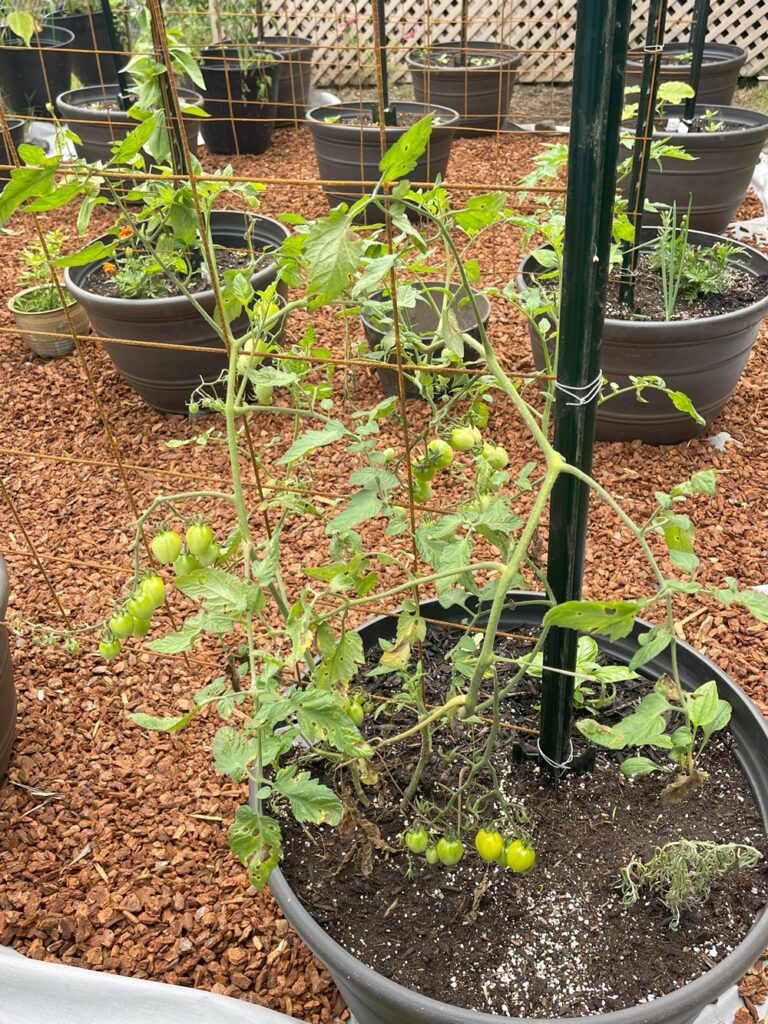
Tomatoes: 9 different varieties, a mix of heirloom and hybrid types, as well as cherry and full-sized tomatoes.
Peppers: 7 varieties, including sweet and hot peppers.
Lettuce: A variety of leafy greens for fresh salads.
Herbs: Essential for cooking, including basil, cilantro, lemon balm, and oregano. These herbs help deter some pests.
Eggplants: Thriving in the warm conditions.
Carrots: Growing deep in the loose, well-aerated soil of the containers.
Onions: Mostly green onions that I can harvest as needed. These also help to deter some pests.
Zucchini and Cucumbers: They climb up the trellises well, but “thriving” might be an exaggeration for these. Pickle worms are terrible here, so I struggle with the squash type plants. But I keep trying!
Beans: Climbing the fencing and making use of the vertical space.
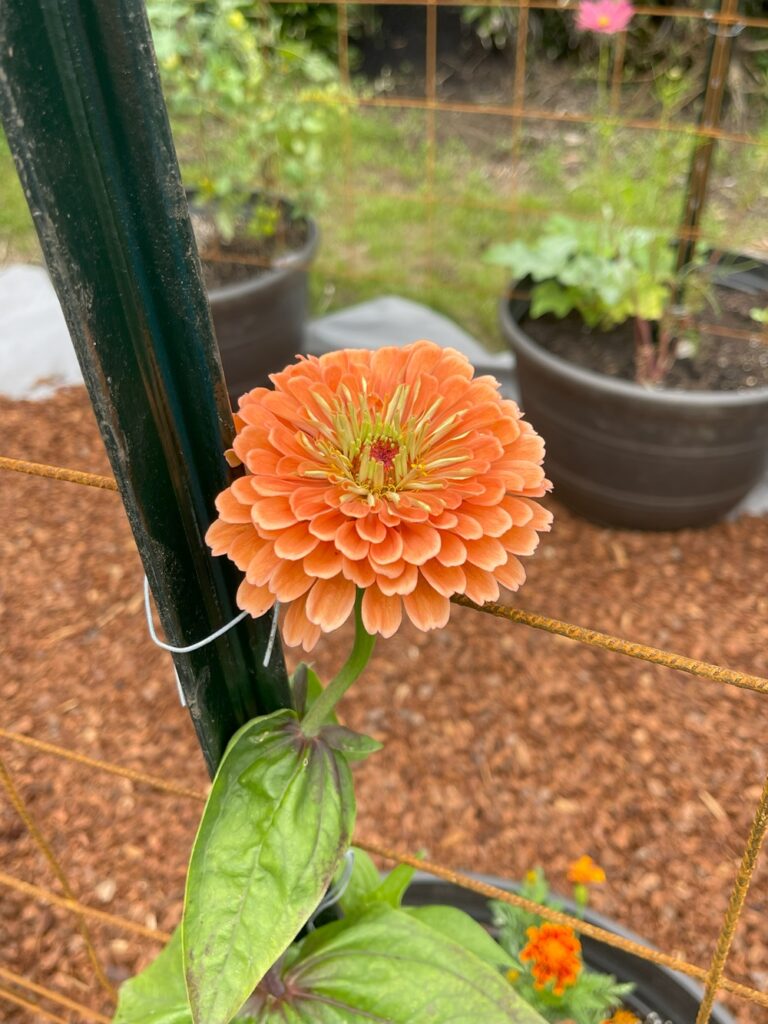
Flowers: Adding beauty and attracting pollinators to my garden.
The Results: A Thriving Garden
What started as a weedy patch of rocky land is now a lush, productive garden. My trellises are sturdy, cost-effective, and customizable. They support a variety of plants, from bulky tomato vines to climbing beans, and they make the most of my limited space.
The containers, meanwhile, have proven to be the perfect solution for growing healthy, productive plants in an environment where traditional gardening would be frustratingly difficult.
Before and After: My Garden’s Transformation
When I look back at the photos of my backyard before I started the garden, I’m amazed at how far it’s come. What was once a weed patch with a few flowers is now full of thriving produce, thanks to a little creativity and hard work.


Closing Thoughts
Gardening in challenging conditions isn’t impossible—it just requires a bit of innovation. Whether you’re battling rocky soil, limited space, or both, container gardening and DIY trellises can help you create a beautiful, productive garden.
What challenges have you faced in your garden? Let me know in the comments—I’d love to hear your stories!


